Showing posts with label black and white. Show all posts

Friday, August 7, 2026

Best Wishes, To My Friend

Time for another card swap - CM June swap cards – Christmas & Sketch (once again, I was extremely late in making and sending these cards)

Card #1 – Black & White + 1 colour

I knew which direction I was going to go with this one - black & white + Gold
 
Thanks to my swap partner for taking the photo :)
 
I die cut a selection of flowers, leaves and stems from the Spellbinders Be Bold Blooms die set using my Cuttlebug.
 
I die cut a black cardfront using my Waffle Flower A6 Nesting Rectangles.
 
I played with the layout of flowers for a while until I was happy, then proceeded to attach flowers using a combination of glue and foam squares.
 
I attached the black cardfront to the white cardbase, then finished with gold sticker 'best wishes' sentiment.
 
No added bling for this card.
 

Linking Card #1 with the following challenges:


 Just Us Girls #835 - Die Week


Card #2 – Tic Tac Toe

I went with the middle column - Bright Colours, Friend, Gems


I settled on the 'bright colours' option and knew I wanted to utilise a rainbow and as I was browsing through my stamps, I came across my Altenew Mini Delight Mini Paintbox .... perfect!  I have had this stamp in my stash for a little while, and I don't think I have used it yet!

I positioned the paintbox and sentiments then stamped using the Couture Creations stamp positioner so that I could stamp twice and get a good impression.


I coloured in the 'paint pots' using Altenew Inks and then stencilled the background using the same Altenew Ink colours, then added Crystal Accents to the paint pots.   I then trimmed and attached the cardfront to the cardbase.
 
I added gems with glue, the final element in the Tic Tac Toe.
 
This card came together quite quickly, and I am very happy with the way it turned out.
 

Linking Card #2 with the following challenges:


NBUS Challenge #89  - 'stencils'  I have had a huge pile of stencils in my stash for quite some time now and have only used 2 or 3.  I am aiming to use each stencil, at least once before Christmas!  LOL


Thank you for visiting my blog today - I hope you have a good day.
Remember, any day doing something you love makes it a good day ;-)
Doing what you like is freedom. Liking what you do is happiness.


Monday, May 13, 2024

Card Swap - April

The theme for my CraftMad card swap for the month of April was

Black & White + Sketch

we were to make two cards, one following the theme and one following both the theme and the sketch.


So here are my cards - which I was late in making and late in sending:

Card #1 - Following Theme
I have been playing with a new die set I got from Amazon ..... a coneflower (built with several layers)  It's a cheapie version of Honey Bee Stamps, Lovely Layers Coneflower.   I would have loved to be able to buy the original brand version, but here in Australia with our lousy exchange rate at the moment, the conversion from USDollars is just too much.  So for now, I go with the Amazon copies.
 
Onto how I made the card ....... I die cut all the layers of the coneflower out and used a blending brush to colour in with black ink.  As I knew I was going to ink blend all the layers, they were cut out from the various off-cuts of white cardstock I have lying around.  Layers were coloured with slightly different intensities of black, then layered together with glue.  Leaves were ink blended and positioned accordingly.  White background layer was run through Cuttlebug using Provo Craft 'Swiss Dots' embossing folder  (this was one of my very first embossing folders ever bought back in 2008, and is often a 'go to' background) . Sentiment 'hello' was die cut several times from black and layered to provide dimension.
 
 
The embossed background was added to a black cardbase, then the flower and sentiment were positioned accordingly. 
 
Linking with the following challenges:
Addicted to CAS - #258 - Flower
Cut It Up Challenge #303 - Add a sentiment


Card #2 - Following Theme + Sketch

I played with some cardstock/papers from my stash for this one!  The black & white papers I have had 'forever' along with the black & white mulberry paper flowers.
 
I stamped & die cute the sentiment 'thank you' using black ink and added another layer to add dimension.

The card was laid our following the sketch - the black diagonal border being added with foam dots to add interest.  A final touch of bling with a gem in the centre of the flower. 
 
I have finally put my cards in the mail - they sat completed for quite some time before I got out to the Post Box - my bad!


Thank you for visiting my blog today - I hope you have a good day.
Remember, any day doing something you love makes it a good day ;-)
Doing what you like is freedom. Liking what you do is happiness.


Saturday, February 15, 2014

Happy Valentines Day (& Happy Anniversary)

On 13th February 1982 - we said "I Do"

Happy Anniversary & Valentines Day
just love the little heart shaped bling :)

Happy Anniversary & Valentines Day
love the big bling heart :)


Linking with:
Less is More - Week 159 - Masculine
CASology: Week 82: Bold
Creative Card Crew: #55 KISS (keep it simple & sweet)
Papertake Weekly - with a heart

Thank you for visiting my blog today - I hope you have a good day.
Remember, any day doing something you love makes it a good day ;-)

Doing what you like is freedom. Liking what you do is happiness.

Saturday, August 1, 2009

Penny Black

Over on PennyBlack challenge #59 is a recipe - 3 ribbons, 2 flowers, 1 charm
I have just purchased some lovely Penny Black images and just had to give this one a try!
I love the combination of Black & White & Red, so here is my card.
Black leathergrain cardstock used as a base, three ribbons layered on top of each other, two flowers embellished with bling, one charm (placed over bag on stamped image). Image watercoloured and kindy glitz added.
I love the fun in this one!
Cuttlebug & spellbinder dies used to cut oval panels.
Tuesday, July 14, 2009

Stamptacular Sunday Sketch #15

Over on StamptacularSundayChallenge another sketch appealed to me.
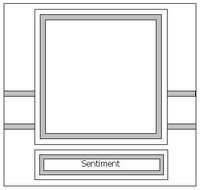
White square cardbase was used, black & white ribbon placed across middle. House Mouse image watercoloured and rub-on sentiment layered on Bazzil bling. left over bits of stickers used to highlight corners.
Cupcake highlighted with kindy glitz.

Saturday, June 27, 2009

Stamp Something Challenge - black and white

Last week's Stamp_Something challenge was to use black & white and one other colour. I know I am a bit late with this one, but I figured I would post anyway. I am pleased with the way it turned out.
White cardstock was stamped multiple times with candle stamp, coloured in red with watercolours and flames highlighted with kindy glitz. Black & red ribbon placed across top third of card and Stamped sentiment mounted with foam dots.
here is another card I did later, just with black & white - does the kindy glitz count as another colour? ;-)
I like the clean look of this card.